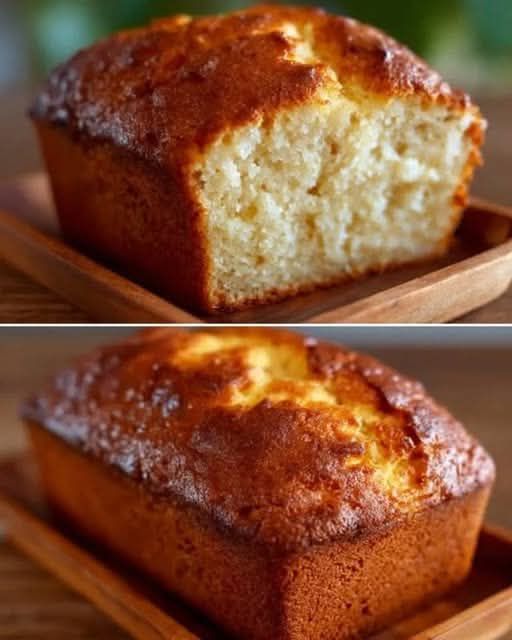
Imagine walking into a sun-drenched farmhouse kitchen where the air is thick with the heavenly, yeasty aroma of freshly baked bread. There is nothing quite like the magic of Amish White Bread. This isn't just your average loaf; it is a masterpiece of texture and flavor. With a cloud-like, pillowy crumb and a subtle, delicate sweetness, this traditional recipe captures the heart of home baking. Whether you are looking to elevate your morning toast or create the perfect base for a gourmet sandwich, this Amish-style bread offers a level of homemade goodness that store-bought loaves simply cannot match.
Why This Amish White Bread is a Kitchen Essential
What sets this recipe apart is its incredible versatility and soul-warming simplicity. Loved by generations for its tender bite and golden crust, this bread strikes the perfect balance between a standard white loaf and a slightly enriched specialty bread. It is the ultimate comfort food—simple enough for a beginner baker, yet high-quality enough to impress even the most seasoned culinary enthusiasts.
Ingredients You Will Need
To achieve that authentic, traditional flavor, ensure you are using high-quality ingredients. Here is what you'll need:
- All-Purpose Flour: 6 to 7 cups (plus extra for dusting)
- Warm Water: 2 cups (Target temperature: 110°F to 115°F)
- Granulated Sugar: 1/2 cup
- Active Dry Yeast: 1 1/2 tablespoons
- Vegetable Oil: 1/4 cup
- Salt: 2 teaspoons
Step-by-Step Instructions for Perfect Amish White Bread
1. Activate the Yeast
In a large mixing bowl, combine the warm water and granulated sugar. Stir until the sugar is completely dissolved. Sprinkle the active dry yeast over the surface and let it sit for 5–10 minutes. You are looking for a beautiful, foamy layer to form on top—this is the signal that your yeast is alive and ready to leaven your bread.
2. Mix the Dough
Once the yeast is foamy, pour in the vegetable oil and salt, stirring to combine. Gradually add the flour, one cup at a time. If you are using a stand mixer, use the dough hook attachment; otherwise, a sturdy wooden spoon works perfectly. Continue adding flour until a soft, cohesive dough forms and begins to pull away from the sides of the bowl.
3. Knead the Dough
Turn the dough out onto a lightly floured surface. Knead the dough for 6–8 minutes by hand, or about 5 minutes on medium speed in a stand mixer. You are looking for the dough to become smooth, elastic, and slightly tacky but not sticky. This development of gluten is what creates that signature soft texture.
4. The First Rise (Bulk Fermentation)
Shape the dough into a smooth ball and place it in a lightly greased bowl. Cover the bowl with a clean kitchen towel or plastic wrap to retain moisture. Place it in a warm, draft-free spot and let it rise for 1 to 1 1/2 hours, or until it has clearly doubled in size.
5. Shape the Loaves
Gently punch the dough down to release the accumulated air. Divide the dough into two equal portions and shape each into a loaf. Place the loaves into greased 9×5-inch loaf pans. Cover them loosely with greased plastic wrap and allow them to rise for another 30–45 minutes, until they rise just above the rim of the pans.
6. Bake to Golden Perfection
Preheat your oven to 350°F (175°C). Bake the loaves for 25 to 30 minutes. The bread is done when the crust is a beautiful golden brown and the bottom of the loaf sounds hollow when tapped. Immediately transfer the loaves to a wire rack to cool completely.
Pro Tips for the Perfect Loaf
- Master the Temperature: The temperature of your water is critical. If it's too hot (above 120°F), you will kill the yeast; if it's too cold, the dough won't rise. Aim for that "warm bath" feel.
- Don't Over-Flour: It is tempting to keep adding flour, but too much will result in a heavy, dense bread. Stop as soon as the dough is soft and pulls away from the bowl.
- The Sound Test: Always use the "hollow tap" method to check for doneness to ensure the center isn't gummy.
- Storage Secret: For the best flavor, wait until the bread is completely cool before slicing. Store in an airtight container at room temperature for up to 4 days, or freeze slices for long-term freshness.
Serving Suggestions
This bread is a canvas for your favorite flavors! Try these combinations:
- The Classic: Thick slices toasted with salted farmhouse butter and honey.
- The Breakfast Treat: Use thick slices for homemade French toast topped with fresh berries.
- The Gourmet Sandwich: Perfect for turkey, Swiss cheese, and crisp lettuce.
- The Sweet Side: Serve alongside a warm bowl of homemade soup or stew.
Conclusion: Taste the Tradition
There is a profound sense of satisfaction that comes from slicing into a loaf of bread you made with your own two hands. This Amish White Bread recipe proves that you don't need complex machinery or exotic ingredients to create something extraordinary. With its incredible softness, slight sweetness, and timeless appeal, this bread is destined to become a staple in your home. Roll up your sleeves, embrace the process, and get ready to enjoy the best homemade bread you've ever tasted!